Google's Android operating system is riding a wave of popularity that has rapidly eclipsed Apple's iOS, and by the end of 2010 it's expected to overtake RIM's BlackBerry as America's leading smartphone platform. However, despite the relative openness and flexibility of the OS, your Android phone still isn't as powerful and customizable as it could be. To unlock all of your phone's potential, you'll need to root it.
WARNING: Rooting--adding superuser capabilities to your phone by altering its system permissions--is an advanced technique that the inexperienced or faint of heart should NEVER ATTEMPT. It's hacking, folks, and if done improperly it can destroy your phone. Do not follow any of the instructions in this guide or on any of the linked sites unless you are comfortable with the very real risk of turning your phone into an expensive brick. As of this writing, rooting is not supported by any carrier or manufacturer, and will most likely void your phone's warranty. In short: This stuff is for big kids only. No whining if things don't go your way.
Why Root?
With that very real and important caveat out of the way, there are a few really good reasons to root your Android phone. The simplest reason is that rooting your handset allows for some cool features that probably ought to be enabled in Android by default, such as on-the-fly screen capture, tethering capabilities (even on phones whose carriers don't allow it), and advanced firewall apps.
Rooted phones can take advantage of some great performance tweaks--such as CPU overclocking and improved cache management--that can dramatically speed up Android. You can take advantage of these options either by installing a ROM that includes them or by downloading apps from the Android Market that will automatically tweak settings on your rooted phone for you.
It would be a stretch to say that rooting Android is a necessary project for most users. In fact, most people should never even try it on their phones, just as most PC users probably shouldn't attempt to overclock their processors. But if you're an advanced user (or an intermediate user with a taste for adventure) and you know the risks, rooting can help you get a lot more fun and function out of your Android device.
Get Root
Until fairly recently, rooting Android was a messy process that required installing the Android Debug Bridge and hacking the phone from a command line. Fortunately, some industrious hackers have produced a few simple apps that can root your device in seconds with the tap of a finger. In this tutorial, I'll discuss two such apps--Easy Root (for the Motorola Droid, Droid X, and Milestone, and the HTC/Google Nexus One) and Unrevoked(which supports a variety of HTC handsets).
It's important to note here that although these one-click root apps are easy to use, they aren't completely trouble-free. For instance, as of this writing the developer of Unrevoked 3 is reviewing it to solve a problem with the HTC EVO 4G (but Unrevoked 2 is still available). And the latest version of Android, 2.2 (aka Froyo), will present new challenges for root users as carriers and phone manufacturers continue to try to block users from hacking their handsets. These obstacles are a basic reality for anyone attempting to root their device, just as Apple iPhone users must constantly adapt to Apple's efforts to block people from jailbreaking the iPhone.
Even though Easy Root and Unrevoked don't work on all Android phones, they do cover a broad swath of the Android universe. If you're interested in rooting a Samsung Galaxy or another device, however, you still have options--they're just not as easy. Because the state of Android hacking is constantly in flux, your best bet for phones not covered in this tutorial is to google "root" and the name of your phone, or to keep an eye on the discussions about your phone on a good Android forum, such as AllDroid.org.
Step 1: Download a Rooting App
To get started rooting your phone, you need the appropriate app for your device. If you're using a Droid, Droid X, Milestone, or Nexus One, you'll want Easy Root. HTC users with an Aria, Desire, Droid Incredible, EVO 4G, Hero, or Wildfire/Buzz will want to use Unrevoked. With either of these apps, your first step is to download the app directly from the developer's Website and put it in the root folder of your phone's SD Card.
Easy Root downloads as an APK file that's ready to run from the phone, so you could just download it straight onto the device and tap it in your file manager app to run it.
Unrevoked downloads as a zipped file with several files inside it. If you have an unzip utility on your phone, you can download and unzip it directly on your device. Otherwise, you'll need to unzip it on a PC and copy the appropriate file to the phone. Because Unrevoked comes in a few phone-specific files, it's generally best just to copy the correct file from your PC in the first place. The documentation on the Unrevoked site clearly explains which file to use for your particular phone.
Step 2: Install the App
Once you've placed the APK file for your rooting app onto your phone's SD Card, locate it with a file-management app such as Astro File Manager and tap it to start the installation. Follow the prompts to allow the installation. Once this finishes, the rooting app will appear in the phone's App Drawer. Launch it.
Step 3: Root It
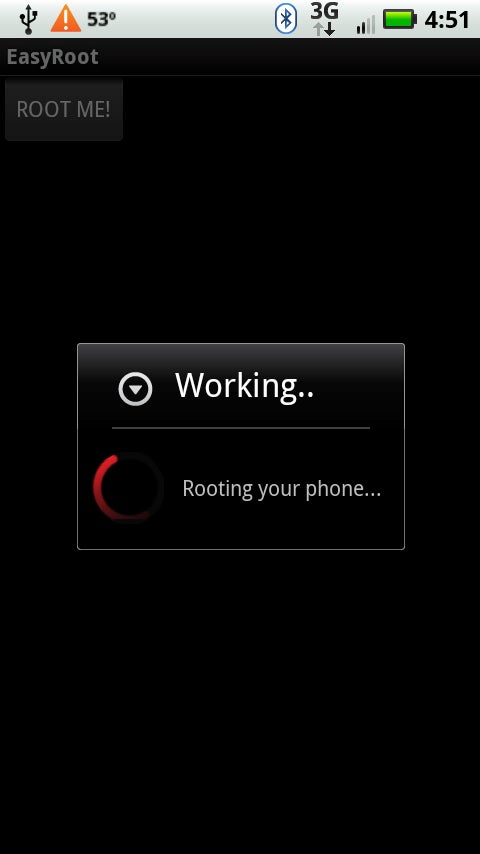
In some instances, running Easy Root or Unrevoked on a supported device and following all the instructions exactly can still result in an unrooted phone. If this happens to you, don't lose heart. The developers of these apps are highly responsive to user questions and feedback, and if you take care to document everything you did and all of the relevant settings on your device, you stand a good chance of getting the help you need to root your handset. Or, at the very least, you could provide valuable information that the developer can use to update the app and make it work on phones like yours. Just remember: Rooting is a precarious business for everyone involved, and these developers have put a lot of work into their projects with very little promise of reward. So be nice, even if you're frustrated.
Step 4: Reboot
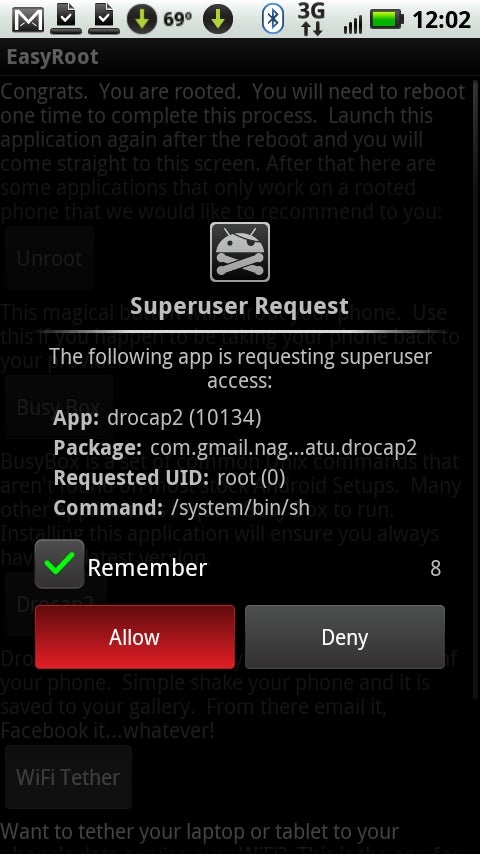
Restart your phone to enable the new root permissions on your device. Congratulations--your handset should now be rooted.
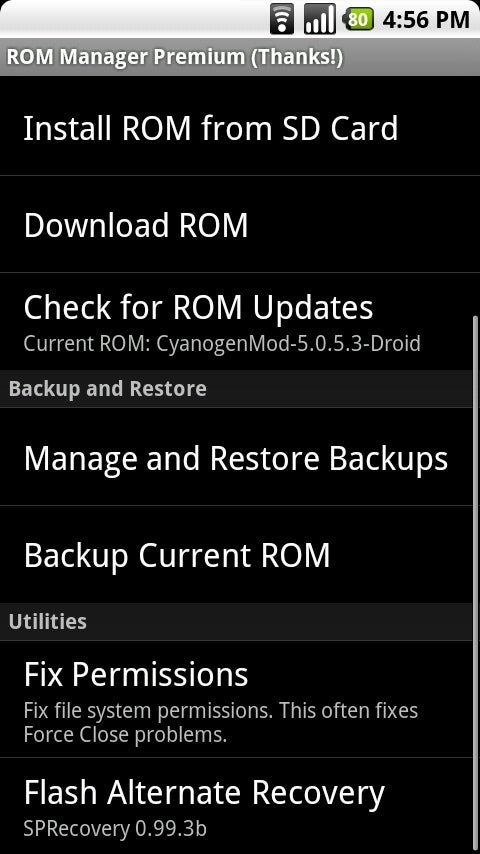
Gaining superuser access to your phone is just the first step in a vast new territory of Android exploration. Depending on which rooting app you're using, you may already be enjoying the performance and usability benefits of a host of enhancements included in your root recovery image. But there's plenty more to explore.
Root users also have the option to overclock the phone's CPU to give it a serious performance boost. For this task, it's hard to beatSetCPU, which offers a friendly slider-bar interface for setting your phone's clock speed. But be careful: Setting your clock speed too high can damage your phone permanently.
Have Fun
By now you should have a pretty good handle on working with a rooted Android device. I've attempted to cover all the basics in this guide, but there's no shortage of additional tips, tricks, and advice that can help you improve how Android functions. If you have some tips of your own to share, please chime in with a comment. And if you think my attempt to simplify the process has resulted in a significant error or omission, please let me know by e-mailingrstrohmeyer@pcworld.com.


